
Growing Beer in Your Backyard
Grow Your Own Beer Garden in Houston
Money may not grow on trees, but growing beer in your garden is almost as good! Okay, okay, you have to brew and ferment it first, but growing beer ingredients for your own personal homebrew is way easier than you think. Plus, it’s pretty fun being the one at dinner parties who shows up with a few bottles of garden-grown ale. Here are the basics of growing beer ingredients in your own backyard:

Grow Your Own Beer Garden in Houston
The two main components of beer that you can grow at home are grains and hops. While you can use a whole variety of different grains for beer brewing, like wheat, or even rice, barley is definitely the most popular option. While the grains provide a base flavor for the beer, hops are what give beer that distinctive, complex taste that’s just the right amount of bitter. Plus, it acts as a natural preservative, which was actually the main reason it was added to beer in the first place. There are loads of different varieties of hops, all with different flavors and aromas that can give your beer all those “sparkling top notes” and “strong, malty finishes” that we always hear sommeliers and beer snobs talking about. I swear, sometimes they sound just like the ladies behind the perfume counter!
If you really want to get fancy with your homebrew, you can even add fresh garden herbs, fruits, and other edibles to create delicious flavor infusions. Barley beers are pretty versatile in their flavor profiles and often have subtle caramelly notes, but wheat beers tend to taste particularly good with tart fruit infusions like raspberry or citrus juices.
There are definitely different ways to grow beer ingredients—you can buy a beer growing kit that comes with the basic tools and instructions for ingredients, brewing, and bottling. But we’ll give you the basic rundown of how beer brewing works, it’s really not as complicated as you might think!
First, you heat up the grains, so they dry out and crack. Next, you make your mash, which requires you to steep the cracked grains in hot (not boiling) water for an hour to create a beer tea. This causes the grains to release sugars into the water. Strain it, and now you’ve got your wort!
Next, you boil the wort for around an hour, adding in all the hops and other spices or flavors you’d like to include. After boiling, you cool it down, strain and filter it, then pour it into a fermenting container and add yeast. All that sugar that was released in the mash will act as food for the yeast, who will pretty much just eat it up and then burp out CO2 and alcohol over the course of the next few weeks. After fermentation, you can bottle it up and let it sit for longer to develop natural carbonation, or you can artificially carbonate it to enjoy it sooner.

How to Grow Hops for Beer
So, hops grow on a vine called a bine (which is weird, right? Like, just call yourself a vine). Anyways, you’ll need a trellis, or something installed in your garden for the vine to grow along. Lots of people prefer to hang a thick rope from the side of their home or garage, and the bine will naturally creep up it. Green pinecone-y looking things will pop up all along the bines, and those are what you harvest to add into your beer.
Hops are grown from a rhizome that needs to be planted in the spring, in super well-draining soil, with a healthy dose of fertilizer or some extra compost mixed in. The bright sunshine in Houston is perfect for bringing out the best flavors from your hops, but you should make sure to water it frequently, so the sun doesn’t dry out the soil too much.
You’ll know when your hops are ready to harvest once they’re dry and spongy, bouncing back to their original shape when you squish them between your thumb and forefinger. If they don’t bounce back and stay dented, they’re still too moist and need to dry out more. Dried hops will also have an interesting smell that’s kind of like a cross between cut grass and onions, and if you crack it open it’ll be full of yellow powder. Wear protective gloves when you harvest your hops, because they’re covered in tiny hairs that are notoriously prickly, and some people will actually develop a skin rash after touching them.
After harvesting, you still need to dry them out a bit more, so you can either pop them in a food dehydrator if you have one handy, or you can sprinkle the hops across an air filter screen, lay a black cloth overtop, stick it in a warm spot in the house with decent air circulation, and give ‘em a little shake once in a while. Don’t leave them out to dry for over 72 hours. You’ll know they’re sufficiently dry when you can snap them in two. Try to use them as soon as they’re ready, but if you want to use them later just seal them up in an airtight bag and toss them in the freezer— really make sure there’s as little air in the bag as possible.

How to Grow Barley for Beer
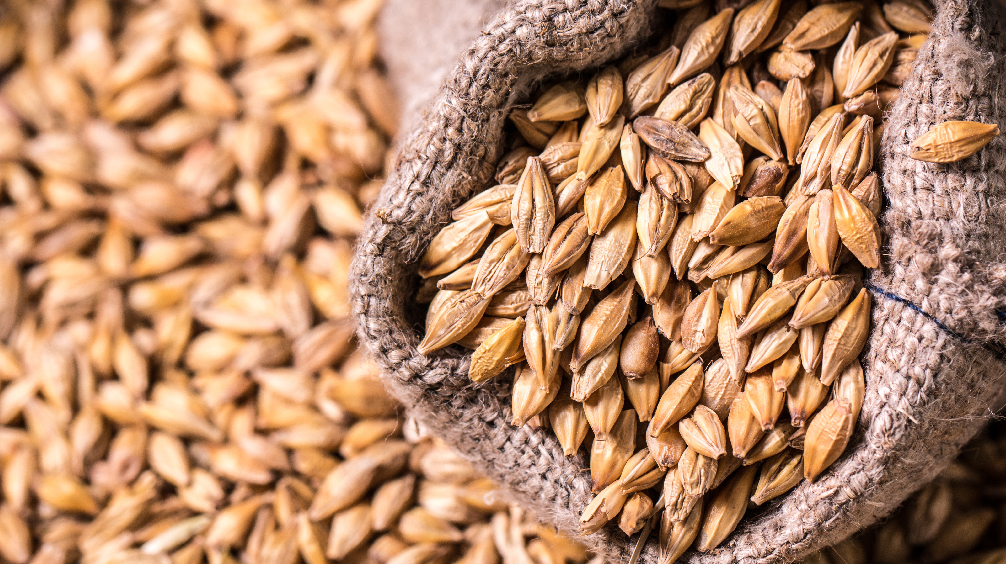
Barley is surprisingly easy to grow, and it develops a lot faster than other grains, so it’s a good option if you’re a bit of an impatient gardener. While you may never have considered growing grain for beer since it’s usually done commercially, it’s actually kind of pretty and can add some texture and movement to the landscape. You just need to have a decent amount of space to devote to it. A 6×6 foot plot full of barley will produce anywhere from 3-8 pounds of barley, which is a decent amount to start, but if you plan on doing a lot of beer flavor experimentation, or just want a good backup in case your trial-and-error brewing is heavy on the error, you’ll probably want to double up in size.
There are two types of barley—six-row and two-row—and these names refer to the number of grain rows on the head of each barley stem. Two-row is used in malt beers, but six-row is the more popular kind used in most American beers. Find a barley seed supplier and get one of the experts to help you pick out a cultivar that’s suited to grow here in Texas.
Barley grows well in loamy soil that hasn’t been treated by much fertilizer. It needs to have some potassium and phosphorus in the soil, but too much nitrogen is a no-no–it will make the seeds too high in protein, which will affect the way they malt. Barley grows best in pH neutral or slightly alkaline soil, so do a soil test to make sure it isn’t too acidic and amend it accordingly if need be. Sprinkle the seeds across the soil in early spring and press them in lightly, aiming for about one seed per inch. Water them well, and then be on the lookout for any weeds that pop up. Seriously, weeds are the sworn enemy of grain plants, and even though barley is one of the tougher of the grains, you still need to be on your A-game for weed control.
If the season hasn’t been too rainy, water your barley occasionally, but for the most part, if we get a few good rain showers in there, it should grow just fine. Usually, the barley is ready to harvest in about three months, maturing to a nice golden-brown color. Your best bet is to purchase a grain sickle for harvesting the barley, but they can be kind of hard to find, so you might just need to settle for garden shears. When you cut off the grain heads, bundle them up into groups of 8 or 10, tie them up and dry them out for a couple of weeks in a warm spot with continuous airflow. Once they’re dry, you need to pretty much bash off all the grains from the stems by “threshing.” This is one of the more fun parts of making beer, and there are a few different ways to do it—some methods a little less graceful than others.
Growing beer ingredients in Houston is totally possible and, you have to admit, totally badass. Have fun experimenting with different unique flavor infusions and exotic varieties of hops—who knows, maybe you’ll be the next Alexander Keith! Visit Plants for All Seasons and our experts will help get you started on your beer-brewing journey.